

Install and Configure the Plugin
1
Install the plugin
Log in to your Dify platform, navigate to Tools → Plugin Marketplace, search for SoMark, and add the plugin.
2
Configure plugin settings
After installation, open the plugin configuration page:
- Base URL: For SoMark API, fill in
https://somark.ai/api/v1; for self-hosted deployment, fill in your local Base URL. - API Key: Required for SoMark API; leave blank for self-hosted deployment.
No API key yet? Go to the SoMark API Studio to get your API key.
3
Save
Click Save — the plugin is now ready to use in workflows.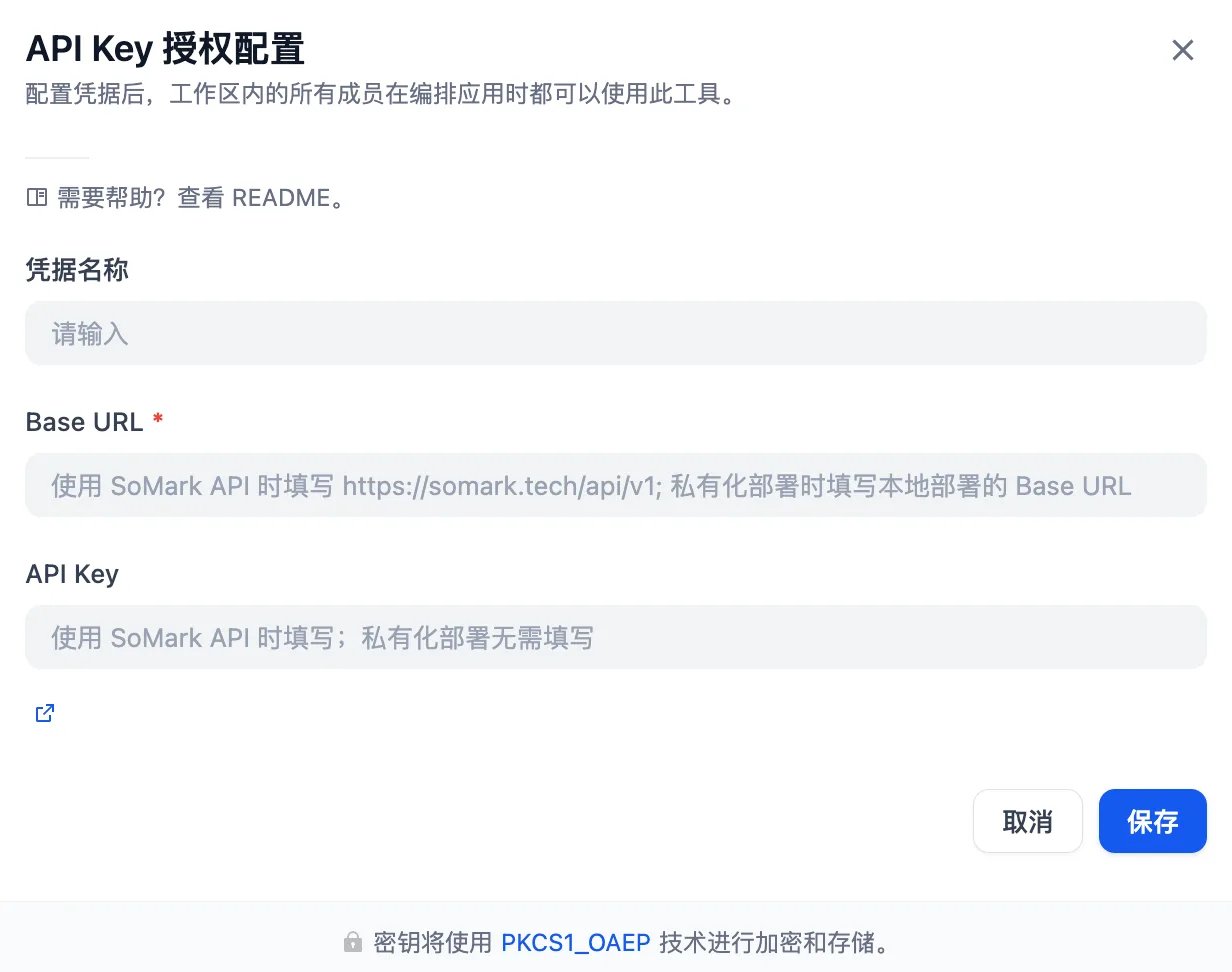
Using SoMark in a Workflow
1
Add the SoMark Document Parser tool node
In the Dify workflow editor, click + to add a new node, choose Tool, then find and add the SoMark > SoMark Document Parser node.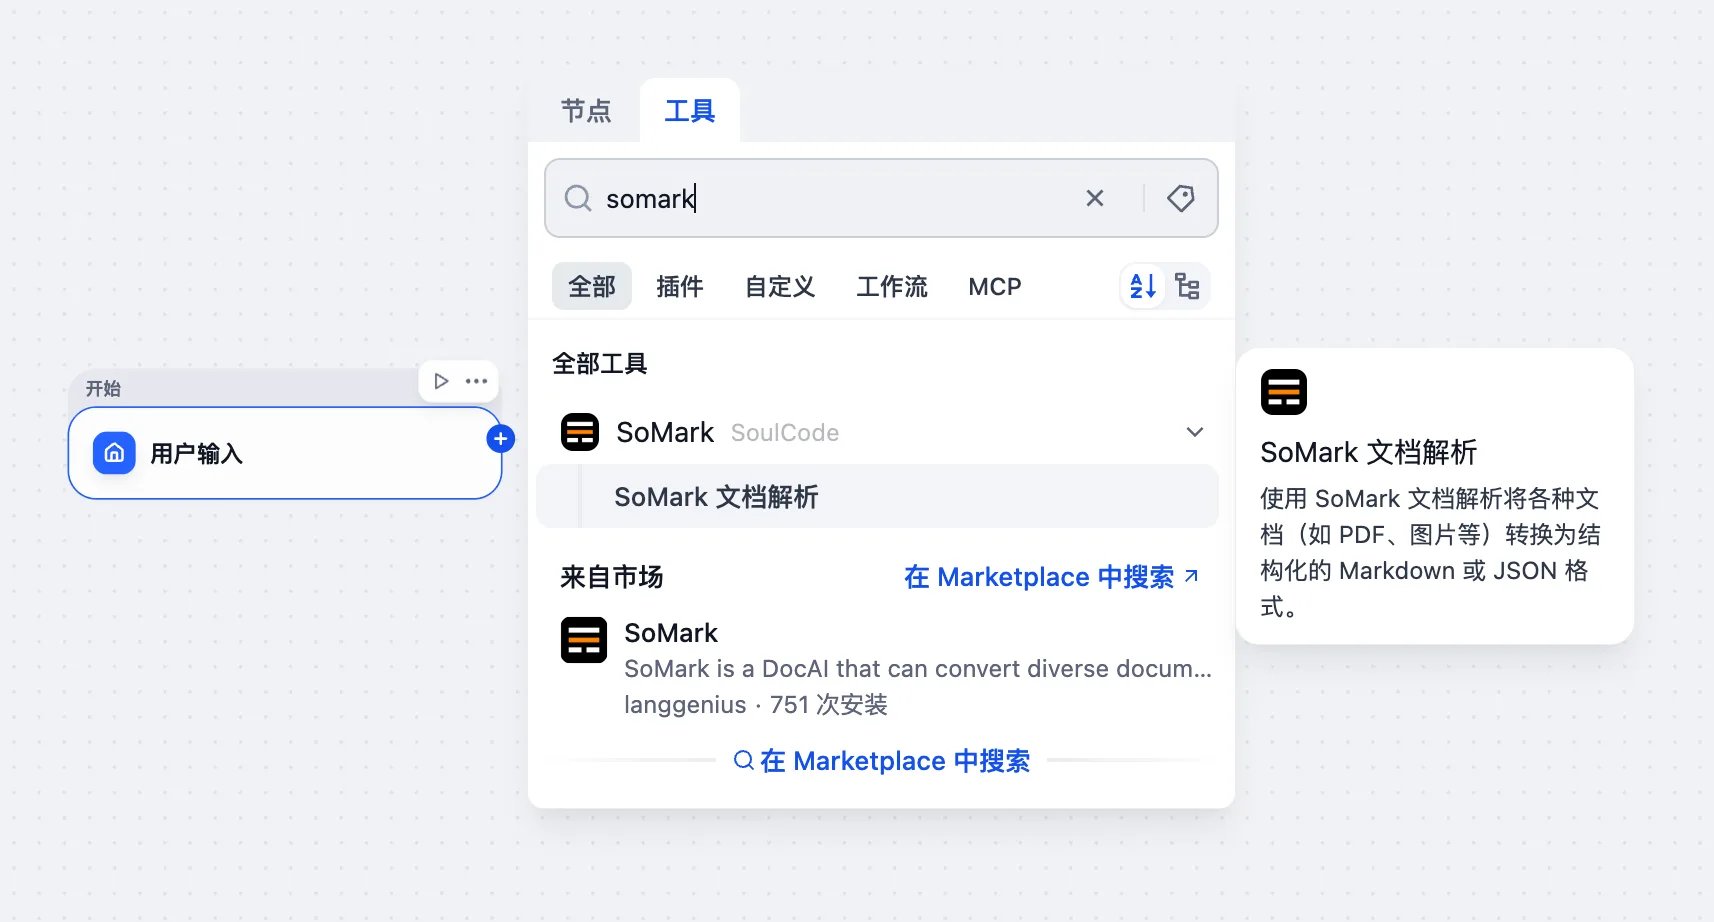
2
Configure input variables
Click the variable icon 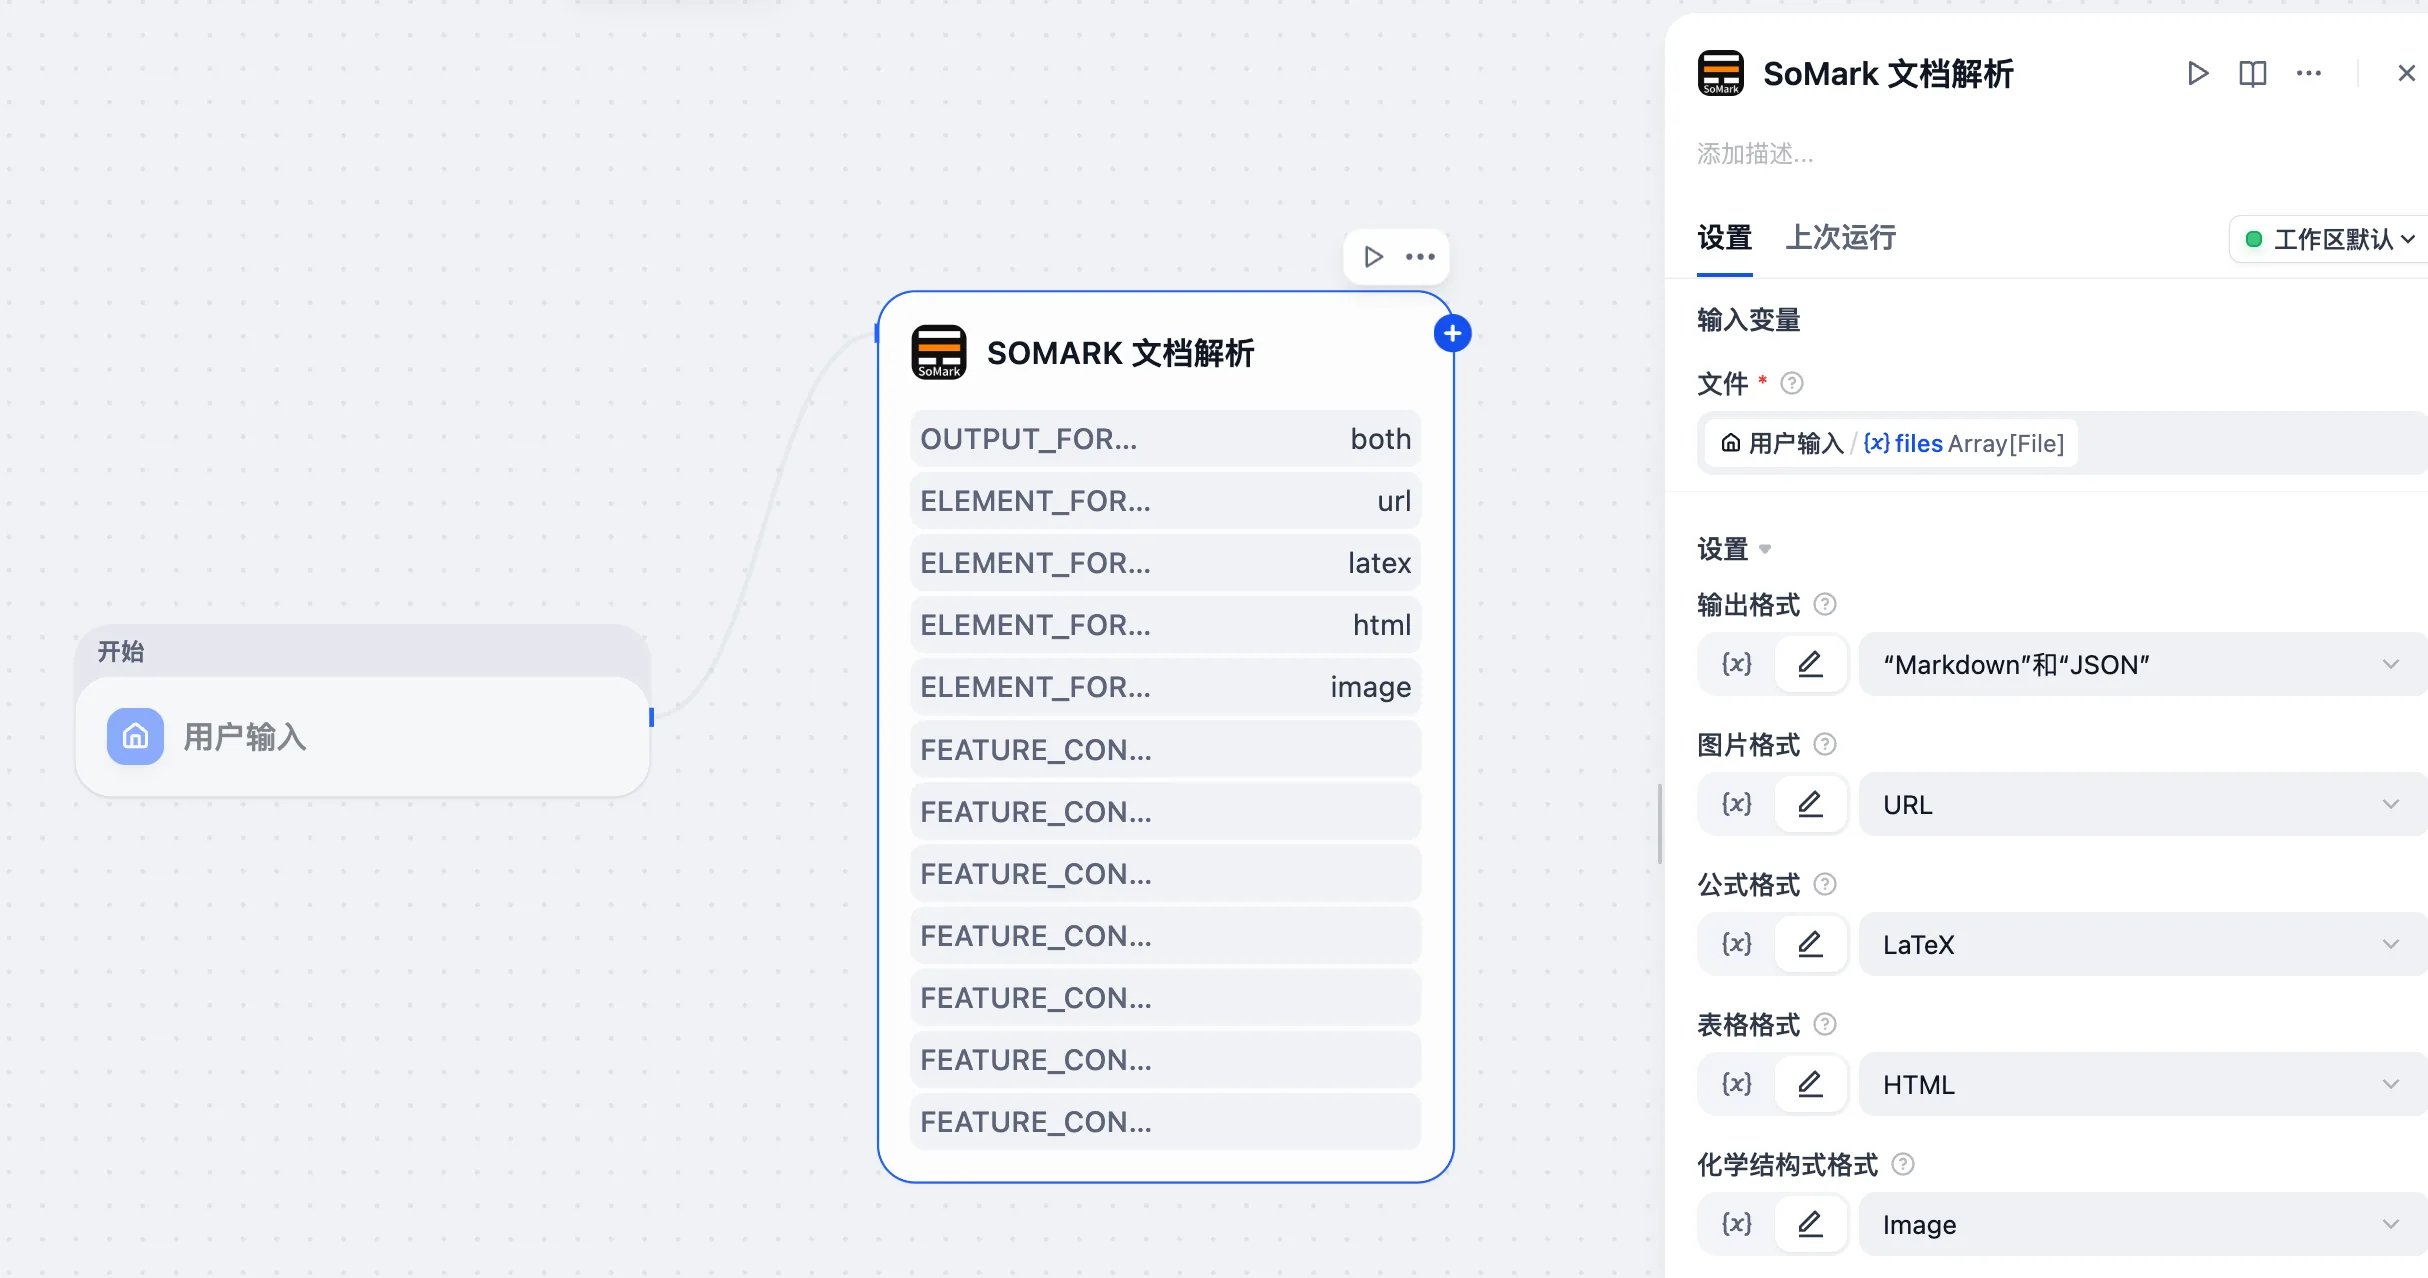
{x} in the File input field and select the file variable provided by an upstream node, such as sys.files from your Start node.
You can also configure optional parameters (for example Output Formats, Image Format, Table Format) as needed. If left empty, the default values are used. See Input Parameters below for details.
Base URL and API Key are injected automatically from the plugin configuration. You do not need to enter them in the node.3
Reference outputs in downstream nodes
Once the node executes, its output variables are available to all downstream nodes (LLM, text splitter, code node, etc.). Click
{x} in any downstream node’s input field to select the SoMark node’s output variables.